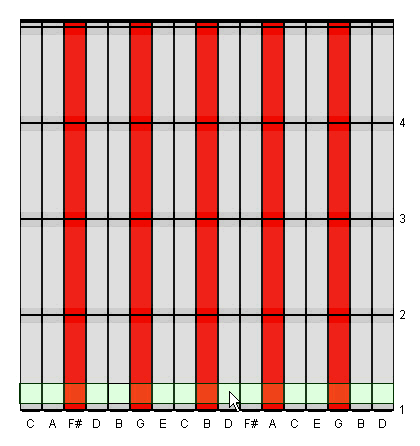
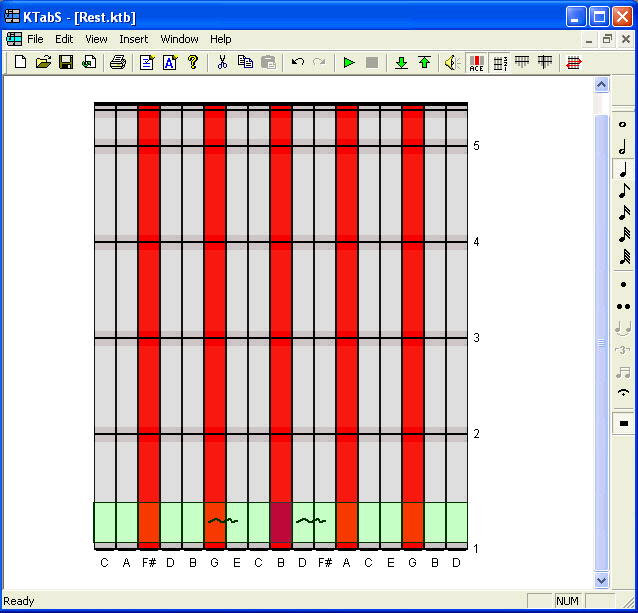
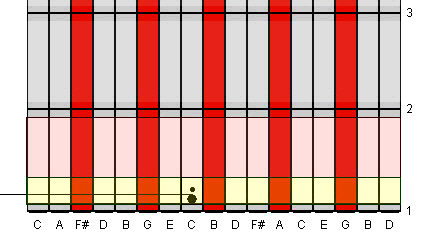
Entering Notes and Rests1. Once you have clicked OK on the "Kalimba Configuration" window , blank kalimba tablature will open. The tablature shown in our pictures is the default tablature that will open if no changes are made to the "Kalimba Configuration" window. It shows a seventeen tine kalimba in the key of G, with five tines shaded red. Under each tine is the name of the note that was assigned to it.
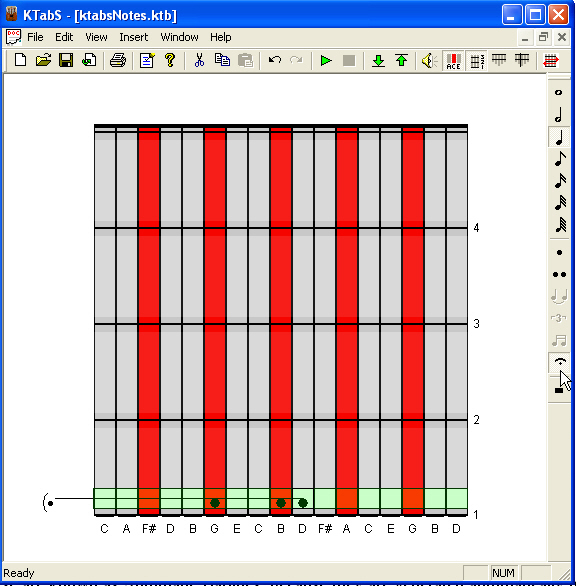
2. The kalimba tablature is divided into barlines and note rows. A barline is a line dividing your music into measures. A note row is a row of tablature between the barlines where notes and rests can be entered. 3. Clicking on any note row or barline will select it, and it will be highlighted green. When you first open new tablature, the bottom barline is already selected and highlighted in green. 1. To enter a note in the tablature, first click on any tine of a note row to select that row. Clicking just above the bottom barline that is highlighted when you first open a new document will select the first note row of your tablature.
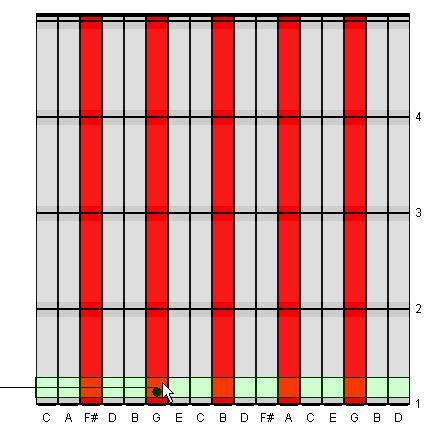
Click on any tine of a selected row to insert a note.
You should hear the sound of the note as you enter
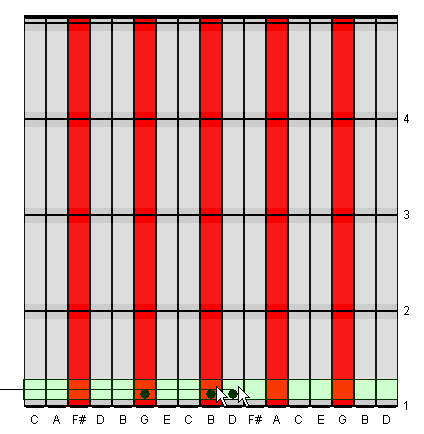
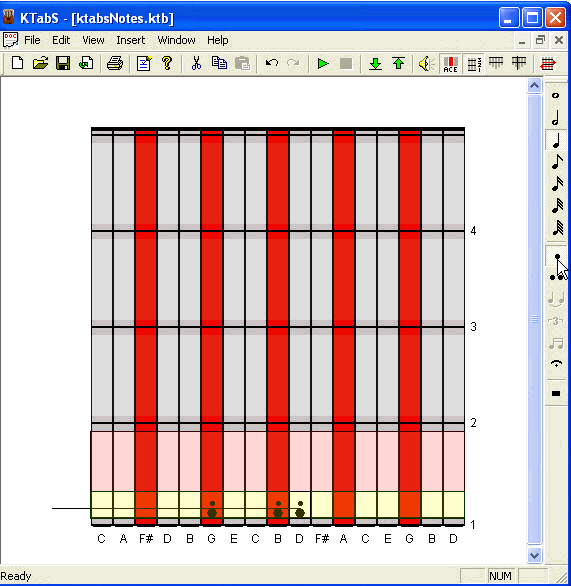
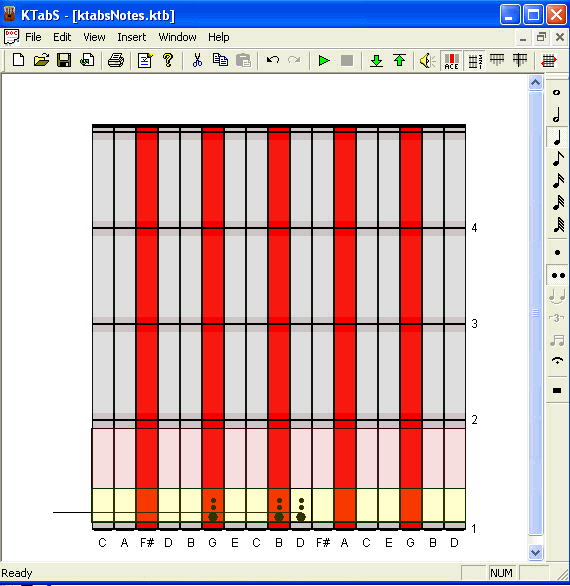
it. (This feature can be turned on or off with the Mute 2. Multiple notes can be entered on one row. Continue clicking tines on the selected row to add more notes.
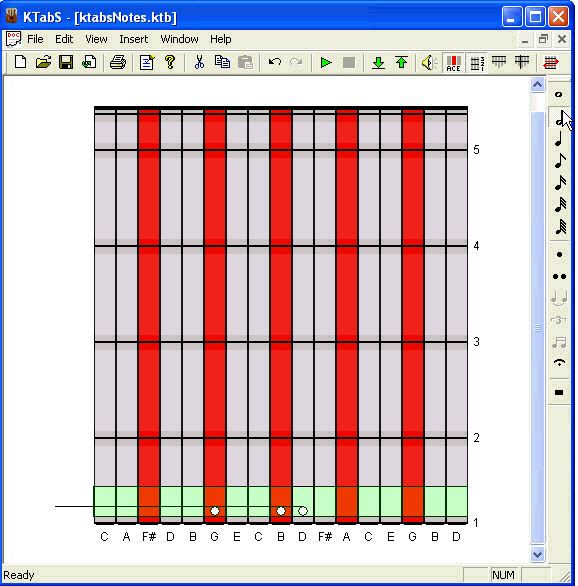
3. The default value of a note row in KTabS is the quarter note. Use the Note Bar to change the value of the notes on the selected row. Example: Clicking the Half Note
4. Clicking on a whole (Sometimes when you change the value of a note, you will see the background of the measure turn from gray to pink. This is because KTabs is constantly keeping track of the beats in your measure and alerts you if the timing for the measure is off. See the section "Barlines and Timing" for more detailed information about this feature.) 5. To erase a note, click on the note when its row is selected and the note will disappear. To enter a rest, click
the "Rest"
You can also add a dot, double dot, or fermata to all the notes on a row by clicking the appropriate icon on the Note Bar while a note row is selected. (The tie, tuplet, and beam icons are used to join adjacent note rows and will be discussed later.) A dot increases the duration of a note by half of its value. Example: A dot is added to these quarter notes by
clicking the Dot
(Note: The background of the measure turns pink at times because KTabS is keeping track of the timing of your measure. If the rest of the notes in your measure were quarter notes, the total count for your measure would be greater than the four beats required by the default 4/4 time signature. This topic is described in more detail in the section "Barlines and Timing ") A double dot increases the duration of a note by half its value plus half of that half. Example: A double dot is added to these quarter
notes by clicking the Double Dot
A fermata is a signal to the performer to hold a note or rest for a duration of their choosing. In playback KTabS will play the note for its assigned duration Example: A fermata is added to these quarter notes
by clicking the Fermata
|
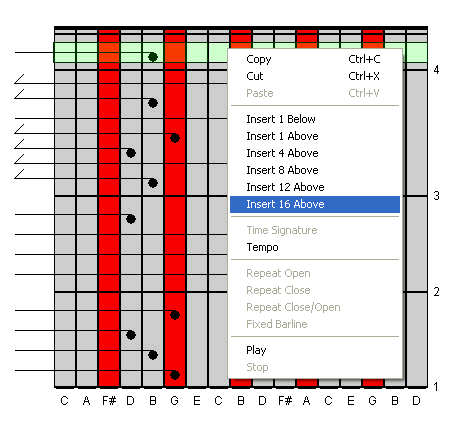
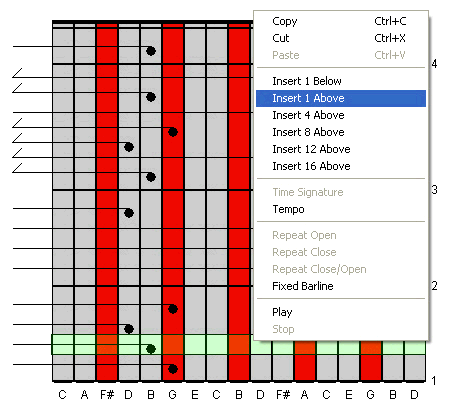
Inserting Rows
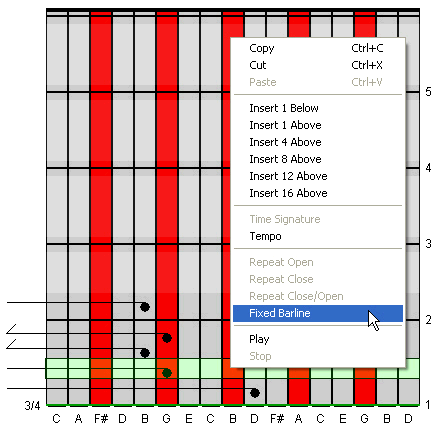
You can add more rows to your tablature at any time by right clicking and
selecting "Insert 1 Below", "Insert 1 Above", or Insert
4, 8, 12, or 16 above from the menu. Those rows will be added either
above or below the row you have selected. Select the last
row of tablature and right click the mouse on that row. Select Insert 16 Above from
the menu to add 16 new rows of tablature. |
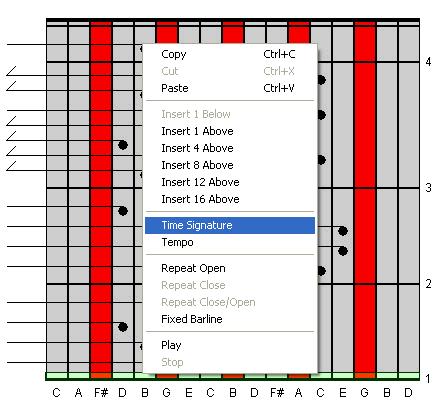
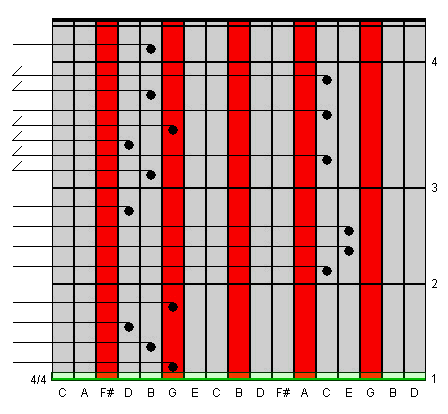
Barlines and TimingBarlines separate music into measures. Automatic BarlinesBarlines appearing black are known as Automatic Barlines, because they are generated automatically by KTabS. These barlines adjust as you enter music, since KTabS is always calculating the correct beats per measure and moving the barlines accordingly. Unless you enter a time signature, the default time signature for your music is 4/4 time. KTabs draws the barlines every four beats to start. As you make changes to your tablature, KTabS adjusts the Automatic Barlines. Fixed BarlinesAt any point in the tablature you can create a Fixed Barline that will not be adjusted by KTabS. There are several ways to create a Fixed Barline: 1) Select an Automatic Barline on the tablature, right click the mouse, and select Fixed Barline from the menu. The black barline will turn green, showing it is now a Fixed Barline. 2) Select any blank row note row where you would like a Fixed Barline to be placed. Right click the mouse, and select Fixed Barline from the menu. A green Fixed Barline will appear in place of the selected row. 3) Any time you add a time signature, tempo, or repeat to an automatic barline, it becomes a Fixed Barline. This is so those important features will not be automatically moved by KTabS. Note: The green color of Fixed Barlines is for editing purposes only. These barlines will appear black in your printed music. Timing
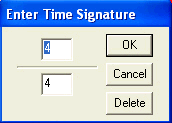
1. If no time
signature is entered, the default time signature is 4/4 time. Timing Errors1. KTabs uses the time signature to calculate beats per measure and automatically draws the measure barlines in the appropriate places. 2. The default
note value for a row, even a row without a note on it, is a quarter note.
So when you first open a new music file you will see automatic barlines
drawn every four rows. If you change the time signature, you will see
the barlines adjust accordingly. As you enter notes and change their
values, the computer will recompute how many beats you have in each measure.
This computation is based on the notes you have entered, as well
as the empty rows with beats assigned to them. (For example, if you have
entered two quarter notes and there are two blank rows left in your measure,
the computer computes the total measure count as four beats.)
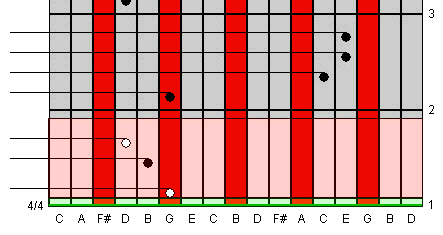
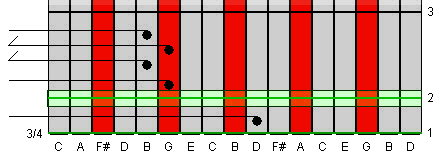
Example 2: After the first note was entered as a dotted half note, KTabS indicated a timing error by turning the measure background pink. Even though no time signature is displayed, the default time signature is 4/4 time. The default value of the three empty rows of the first measure is one beat each. Therefore based on the first note you have entered, KTabS sees a timing error. However, as you continue entering notes KTabS will continue to update its beat count and will change the measure background back to gray.
If you have
finished entering the notes for a measure and it is still pink, then that
indicates a timing error in your measure. Note: KTabs will never show a timing error for the last measure of your music. Fixed Barline to End a Measure1. There are times when you may actually
want a measure to have greater or fewer beats than your time signature
allows (for example, there is a pick-up note at the beginning of your
music). In these cases, you can enter your own Fixed Barline
and the computer will know to ignore the timing
for that measure.
The barline will appear as a green line below the row you had selected on the tablature.
Even though
the above example is in 3/4 time and the first measure only has one beat,
the inserted Fixed Barline ends the measure and lets KTabS know it is not
a timing error. |